
TM 5-2420-230-24-1
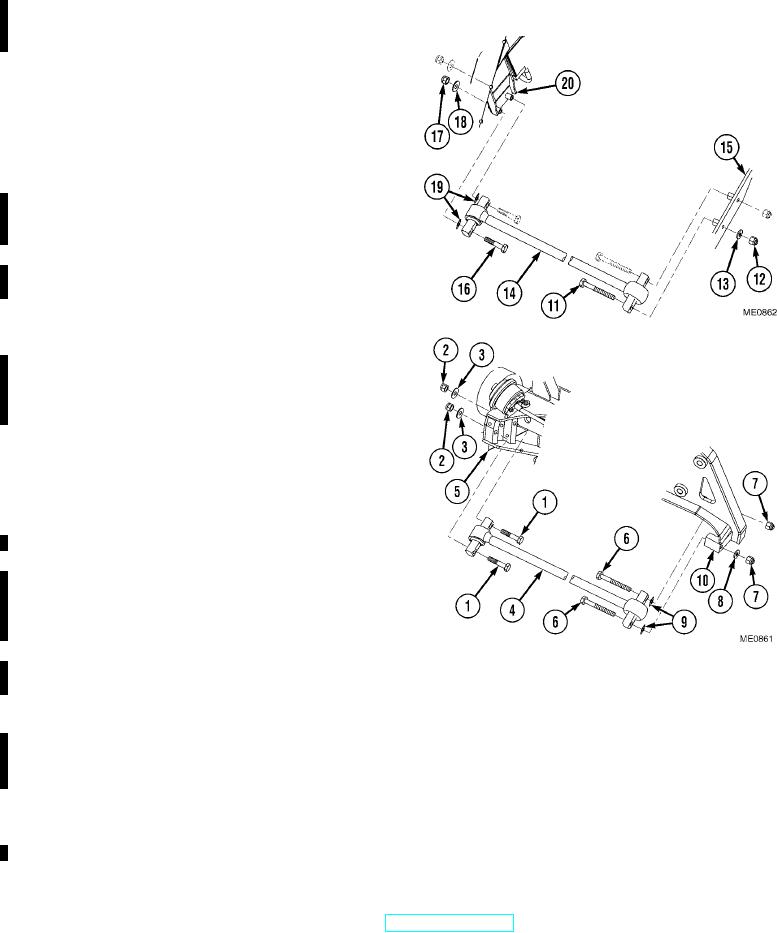
b. Rear Panhard Rod Removal.
(1)
Remove bolts (11), self-locking nuts (12),
washers (13), and rear panhard rod (14) from
rear axle (15). Discard self-locking nuts.
(2)
Remove bolts (16), self-locking nuts (17),
washers (18), shims (19), and rear panhard
rod (14) from frame (20). Discard
self-locking nuts.
c. Rear Panhard Rod Installation.
(1)
Install bolts (16), new self-locking nuts (17),
washers (18), shims (19), and rear panhard
rod (14) on frame (20). Tighten nuts to
95 lbf/ft (128 Nm).
(2)
Install bolts (11), new self-locking nuts (12),
washers (13), and rear panhard rod (14) on
rear axle (15). Tighten nuts to 95 lbf/ft
(128 Nm).
d. Front Panhard Rod Installation.
NOTE
There is no washer on the inside bolt to
connect the front panhard rod to the frame.
(1)
Install bolts (6), new self-locking nuts (7),
washer (8), shims (9), and front panhard
rod (4) on frame (10). Tighten nuts to
95 lbf/ft (128 Nm).
(2)
Install bolts (1), new self-locking nuts (2),
washers (3), and front panhard rod (4) on
front axle (5). Tighten nuts to 95 lbf/ft
(128 Nm).
e. Adjustment.
NOTE
Both front and rear panhard rods are adjusted the same way.
(1)
Measure distance from center point on frame and axle to inside hub. Both sides must measure the same.
(2)
If both sides do not measure the same, add shims (9) and (19) as required until measurements are equal.
f. Follow-On Maintenance.
Remove "Do Not Operate" tag from ignition switch (TM 5-2420-230-10).
END OF TASK
Change 1
5-24

