
TM 5-2420-230-24-2
Section 10 - Air Intake System - Group 10
Charge Air Cooler (CAC) - Pressure Testing (10-07)
B Series Shop Manual
Page 10-9
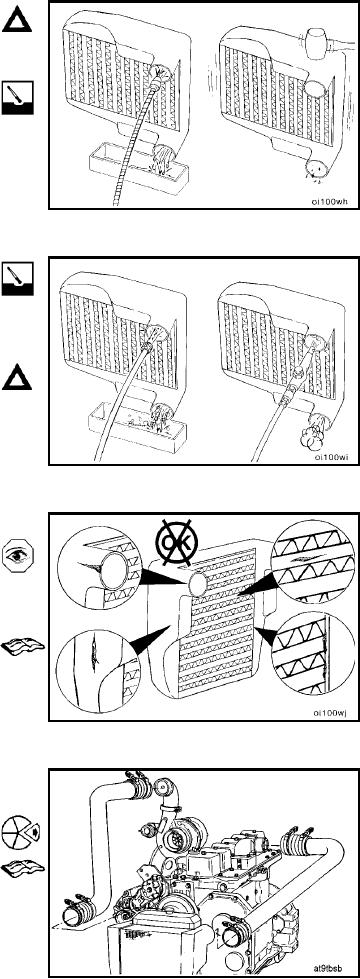
Caution: Do not use caustic cleaners to clean the CAC.
Damage to the CAC will result.
NOTE: Make sure that the tubes are in the vertical direction
when flushing.
Flush the CAC internally with solvent in the opposite
direction of normal air flow. Shake the CAC and lightly tap
on the end tanks with a rubber mallet to dislodge trapped
debris. Continue flushing until all debris or oil is removed.
NOTE: If internal debris cannot be removed, scrap the CAC.
Use a flashlight and mirror to visually inspect the CAC for
internal debris.
After the CAC has been thoroughly cleaned of all oil and
debris with solvent, wash the CAC internally with hot
soapy water to remove the remaining solvent. Rinse thor-
oughly with clean water.
Blow compressed air into the CAC in the opposite direc-
tion of normal air flow until the CAC is dry internally.
Caution: The CAC must be rinsed, dried, and free of
solvent, oil, and debris or engine damage will result.
Inspection
Visually inspect the CAC for cracks, holes or damage.
Inspect the tubes, fins and welds for tears, breaks or other
damage. If any damage causes the CAC to fail the air leak
check mentioned in Procedure (10-07), the CAC must be
replaced.
Install the CAC on the vehicle. Refer to the vehicle manu-
facturer for instructions.
Charge Air Cooler (CAC) - Pressure
Testing (10-07)
To check the charge air cooler for cracked tubes or header,
remove the inlet and outlet hoses from the CAC.
Remove the charge air cooler. Refer to the vehicle manu-
facturer for instructions.
L-418