
TM 5-3805-281-24-2
Alternator, Regulator, and Charging System Wiring
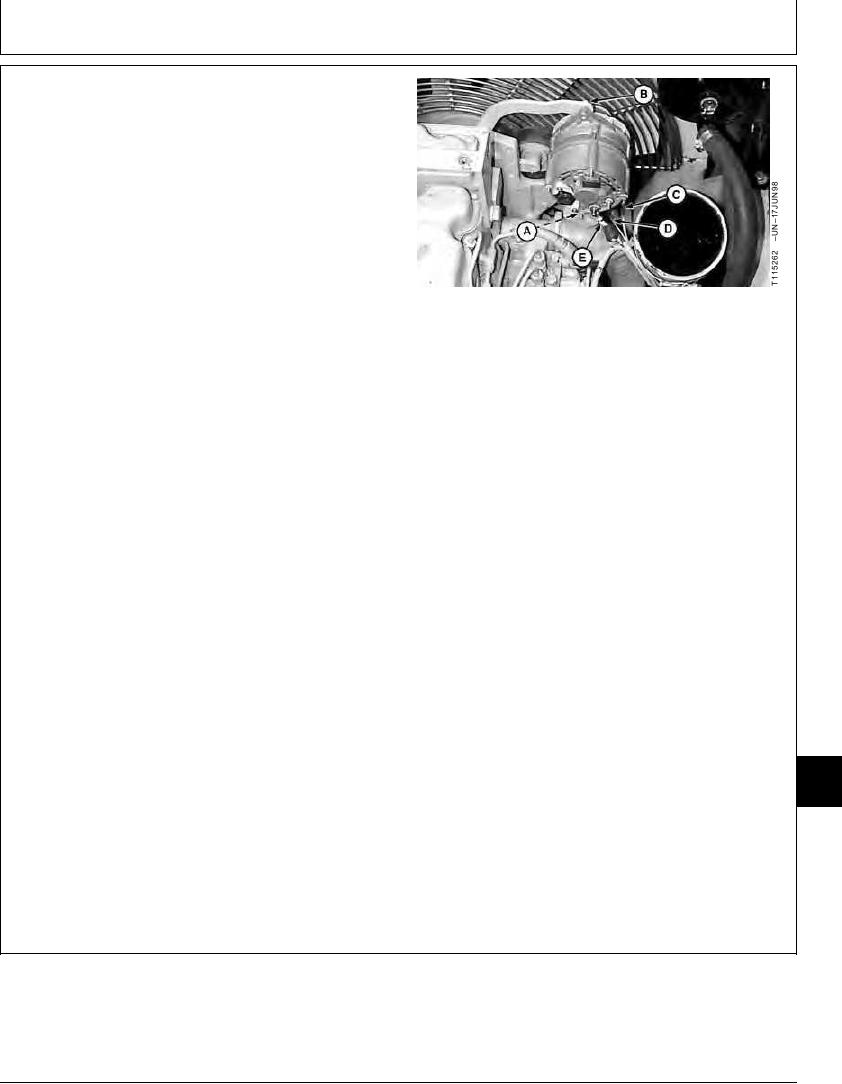
4. Disconnect wiring leads (C--E).
5. Remove cap screw and washer (B) and cap screw and
nut (A) to remove alternator.
6. Replace parts as necessary.
7. Install alternator. Install lower cap screw and nut (A) so
head of cap screw is toward belt.
8. Install cap screw and washer (B).
9. Tighten cap screw (B) and cap screw and nut (A).
A--Cap Screw, Nut
B--Cap Screw, Washer
Alternator Mounting Top Strap Cap Screw--Specification
C--Ground Terminal Wiring Lead
D--D+ Terminal (YEL)
Torque ............................................................................. 27 Nm (20 lb-ft)
E--B+ Terminal (WHT)
Alternator Mounting Cap Screw and Nut--Specification
Torque ............................................................................. 47 Nm (35 lb-ft)
10. Connect wiring leads. Tighten ground terminal nut,
output B+ terminal nut, and D+ terminal nuts.
Ground Terminal Nut--Specification
Torque ........................................................................... 2.3 Nm (20 lb-in.)
Output B+ Terminal Nut--Specification
Torque ........................................................................... 3.6 Nm (32 lb-in.)
D+ Terminal Nut--Specification
Torque ........................................................................... 2.3 Nm (20 lb-in.)
11. Slowly turn breaker bar clockwise to place tension
adjuster assembly against belt. Tension is
automatically adjusted.
16
1672
12. Remove breaker bar from assembly.
3
13. Install air conditioning belt. Tighten adjusting screw.
CED,OUOE003,1152 1907JUL982/2
15-19