TM 5-3805-280-24-1
Adjustments
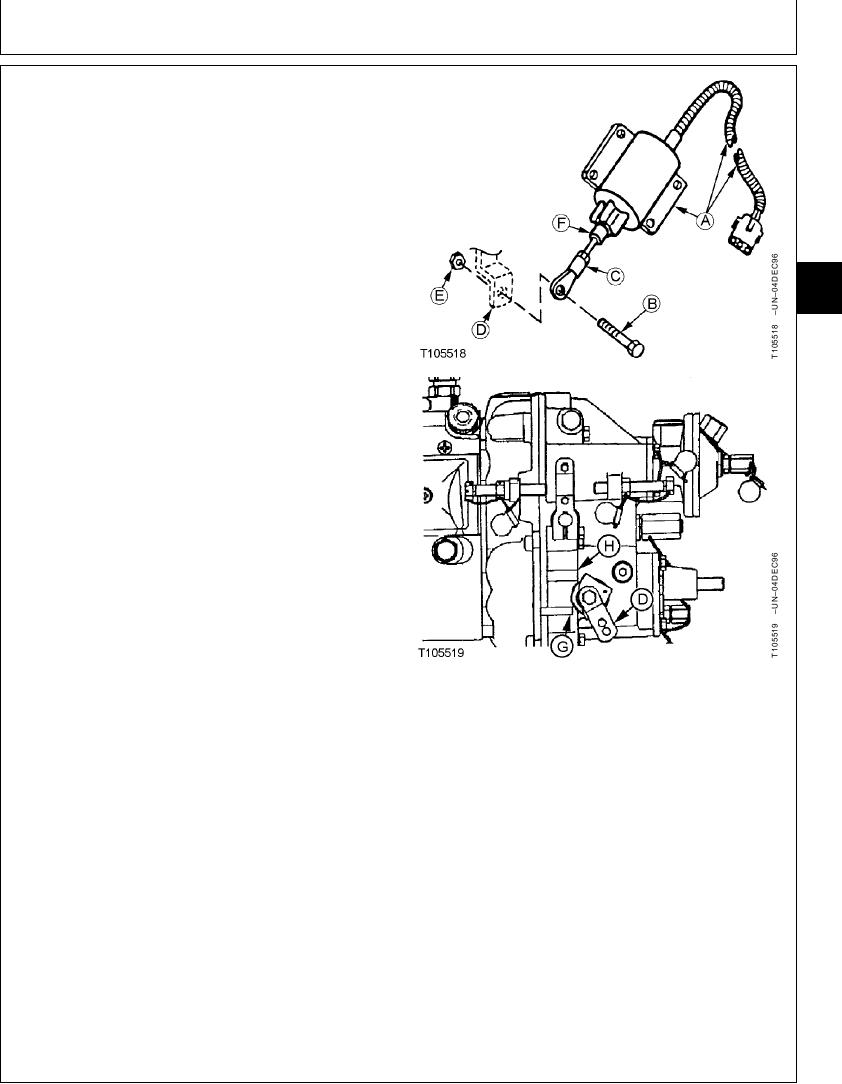
1. Disconnect ball joint (C) from fuel shut-off lever (D).
2. Turn key switch to ON. It is not necessary to start
engine for this procedure.
3. Push plunger (F) into solenoid housing until the
plunger bottoms. With key switch ON, solenoid hold
coil is energized and will hold plunger in the run
position
4. Manually pull fuel shut-off lever (D) up against the run
9010
20
position stop (upper stop) (H).
3
5. Check that hole in ball joint (C) is 3--6 mm (1/8--1/4
in.) short of aligning with hole in fuel shut-off lever.
The 3--6 mm (1/8--1/4 in.) is the amount of overtravel
needed to compress the spring in the plunger to hold
the shut-off lever against the run position stop when
plunger is bottomed in the solenoid housing.
Overtravel Needed--Specification
Distance................................................................. 3--6 mm (1/8--1/4 in.)
6. Adjust ball joint as necessary.
Manually pull fuel shut-off lever up against the run
position stop (upper stop).
Adjust ball joint so hole is aligned with hole in shut-off
lever and then turn ball joint to shorten linkage by three
turns.
A--Shut-Off Solenoid
Ball Joint Hole-to-shut-Off Lever Hole--Specification
B--Cap Screw
C--Ball Joint
Length..................................................................................... 3 turns short
D--Fuel Shut-Off Lever
E--Lock Nut
Hold ball joint and tighten nut.
F--Plunger
G--Stop Position Stop (Lower Stop)
Fuel Shut-Off Solenoid Plunger-to-Ball Joint--Specification
H--Run Position Stop (Upper Stop)
Torque .............................................................................. 8 Nm (70 lb-in.)
7. Turn key switch to OFF.
8. Connect ball joint to fuel shut-off lever using cap screw
(B) and nut (E).
Continued on next page
TX,05,GG2305 1922APR982/3
3-42

