TM 5-2420-232-10
0035
CHAIN REPLACEMENT AND BAR SERVICE
0035
1.
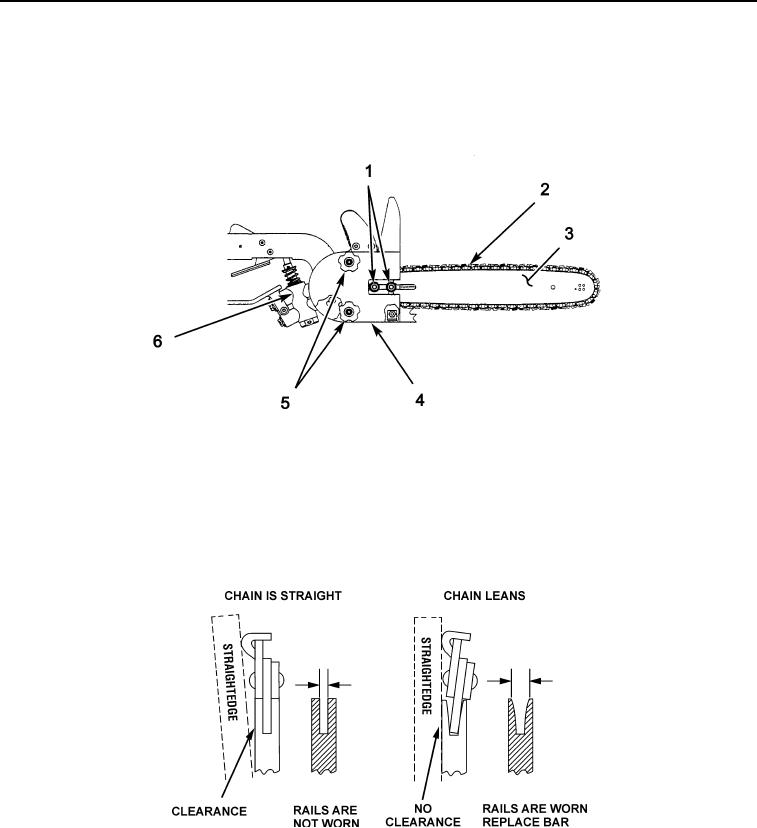
Mark the top side of the bar (Figure 6, Item 3) with a grease pencil or marker.
2.
Remove two knobs (Figure 6, Item 5) and cover (Figure 6, Item 4) from saw (Figure 6, Item 6).
3.
Remove two nuts (Figure 6, Item 1), chain (Figure 6, Item 2), and bar (Figure 6, Item 3) from saw (Figure 6, Item 6). Use
a small cleaning brush to remove all residue from the bar groove.
435-A1385
Figure 6. Chain Replacement
035
4.
Clean the oil passage at the base of the guide bar. Use any instrument small enough to thoroughly clean the passage.
5.
Check the bar rails for wear by placing a straight edge against the side of the bar and one cutter.
a.
Clearance between the bar and straight edge indicates that the bar rails are not worn.
b.
If the chain leans and there is little or no clearance between the bar and straightedge, the bar rails are worn and the bar
should be replaced (Figure 7).
435-A1369
Figure 7. Checking Rails for Wear
035
0035-8

