TM 5-2420-230-24-1
Spicer Speciality Axle Division - Technical Publications
SECTION 11
HUB AND ANNULUS RE-ASSEMBLY Cont.
11.7
Press outer hub bearing cone (71A) onto annulus carrier (18).
11.8
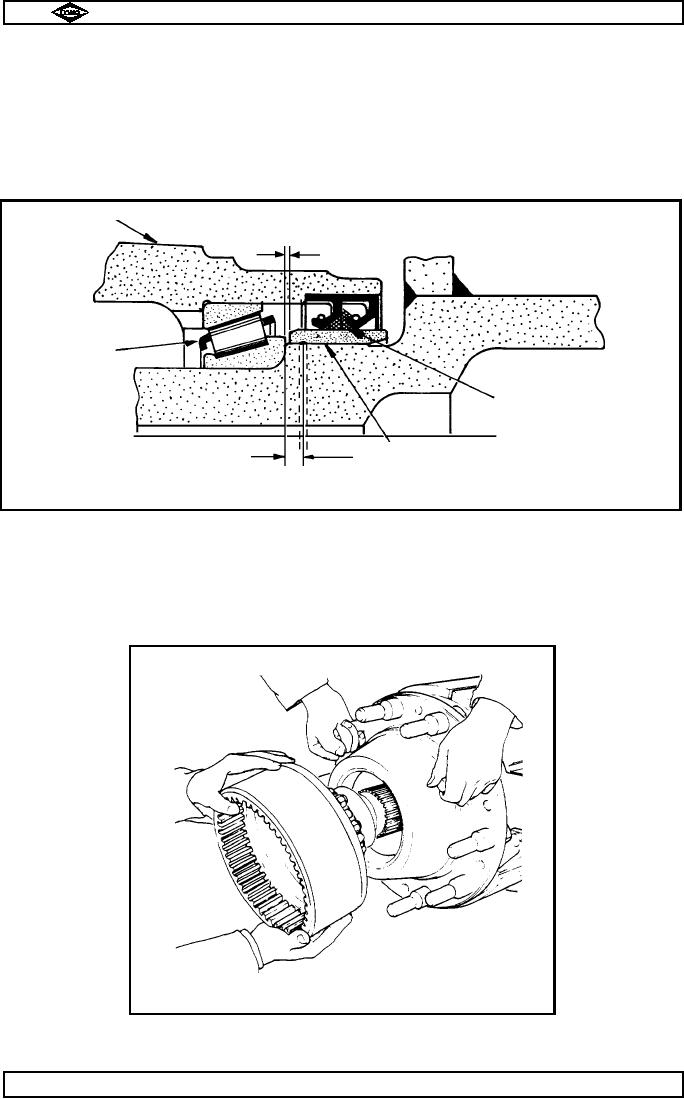
If oil seal wear sleeve (56) has been removed, then a new sleeve should be fitted as follows :-
a)
Clean mating surfaces of sleeve and axle stub (56 & 55) with Loctite 7070 or similar
degreasing agent.
b)
Apply a bead of Loctite No.275 sealing compound completely around axle stub (55),
approx. 1/4" from inner bearing shoulder as shown in fig. no.7.
c)
Using service tool No. E398, knock wear sleeve (56) into position on swivel stub (55).
d)
Allow 2 hours for loctite to cure.
TP325
Hub
0.060"
Hub bearing
Gap between oil seals
to be filled with
high melting point grease
on assembly.
1
/4"
Wear sleeve
Part section through hub
Fig. No.7
11.9
Lightly oil hub inner bearing (22 / 22A), then ease hub onto axle arm (55) such that hub
bearing (22 / 22A) slides onto its location diameter, also seals (68) are felt to contact their location
diameter.
Note :-
Throughout this operation hub MUST be supported so as not to be left 'hanging' at any
point.
11.10
With hub held in place by an assistant or suitably held in a sling, then lightly oil hub outer bearing
cone (71A), and offer annulus assembly to axle arm (55). See fig. no.8.
TP91
Hub held in place - offering up annulus
Fig No. 8.
11.11
Fit axle tube nut pinch bolt and nut (76 & 75)onto axle tube nut (16). Tighten pinch bolt nut finger tight.
11.12
Fit axle tube nut assembly onto axle arm (55), using service tool no. E399, and tighten nut hard.
Page No.D12
Manual No. 1785 Issue A
Spicer Speciality Axle Division
J-104

