
TM 5-3805-281-24-2
Crankshaft, Main Bearings, and Flywheel
INSPECT CRANKSHAFT
NOTE: If crankshaft damper damage was discovered
during teardown, the crankshaft should be
magna-fluxed. This will verify whether of not it has
microscopic cracks or fissures. See INSPECT
VIBRATION DAMPER, in this group.
1. Thoroughly clean crankshaft. Clear restrictions from all
oil passages.
2. Inspect crankshaft for signs of load stress, cracks,
scratches on journals. Also check each journal for
evidence of excessive overheating or discoloration. If
either condition exists, replace crankshaft since heat
treatment has probably been destroyed.
3. Inspect (front) crankshaft gear and (rear) oil pump
drive gear for cracks, chipped teeth, or excessive wear.
Replace gear(s) as required. (See REPLACE FRONT
Inspecting Crankshaft
CRANKSHAFT GEAR and REPLACE CRANKSHAFT
OIL PUMP DRIVE GEAR, later in this group.)
4. Inspect the keyway for evidence of cracks or wear.
Replace crankshaft as necessary.
5. Carefully inspect rear hub of crankshaft in area of wear
sleeve contact surface for evidence of rough or
grooved condition. Any imperfections here will result in
oil leaks. Slight ridges may be cleaned up with emery
or crocus cloths.
6. Check each journal for evidence of excessive
overheating or discoloration. If either condition exists,
replace crankshaft since heat treatment has probably
been destroyed.
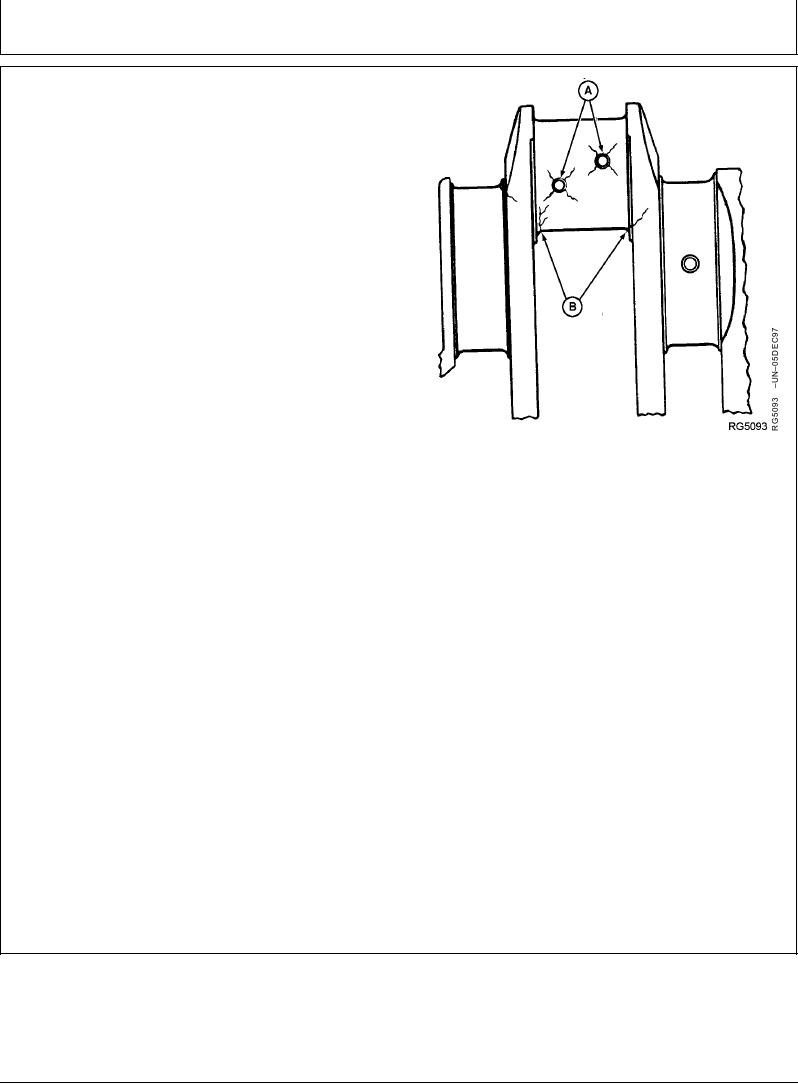
7. Carefully check the crankshaft for cracks in the area of
rod journal holes (A) and at journal fillets (B). Replace
crankshaft if any cracks are found.
Continued on next page
RG,RG34710,1171
1923OCT971/2