
TM 5-2420-230-24-1
3.
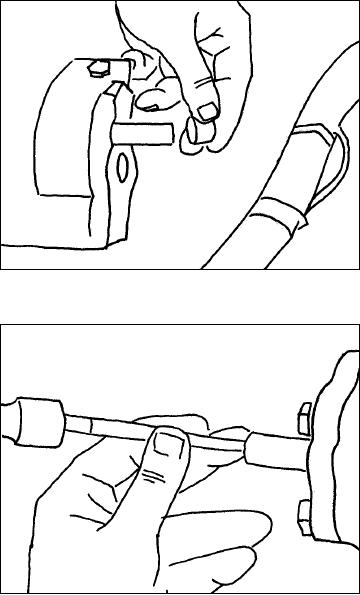
Remove the plastic caps from both plunger
holes. Insert the 1/4" punch into the hole.
Using the hammer, tap the punch until the
plunger "bottoms" in the plunger bore.
Repeat this procedure for both plungers.
Replace the plastic caps after setting the
plungers to the maximum depth.(Figure 38).
NOTE:
Take care when using the punch to insure the
plunger bore is not damaged when adjusting
the auto plunger.
Figure 38
4.
Raise the steer tires until the tires clear the
surface. Start the engine and allow it to run at
idle speed.(Figure 39).
Figure 39
5.
Turn the wheel to a full turn in one direction.
(Turn until the axle stop contacts the axle.)
Pull hard on the wheel to set the auto plunger.
Turn the wheel to a full turn in the opposite
direction. Pull hard on the steering wheel to
set the auto plunger. Return the wheels to
straight ahead.
6.
Lower the vehicle and remove the jack.
7.
Verify the proper setting of the automatic
relief plungers. With the steer tires on the
ground and the full weight of the vehicle on
the tires, turn the wheels to a full turn in one
direction. When properly adjusted, there will
be a small gap between the axle stop and the
axle. Repeat for the opposite turn.
K-51