TM 5-2420-230-24-1
Bearing Cap (Or Input) End Repair
1.
Place a drain pan under the steering gear.
Park the vehicle on a clean, dry surface and
set the parking brake.
2.
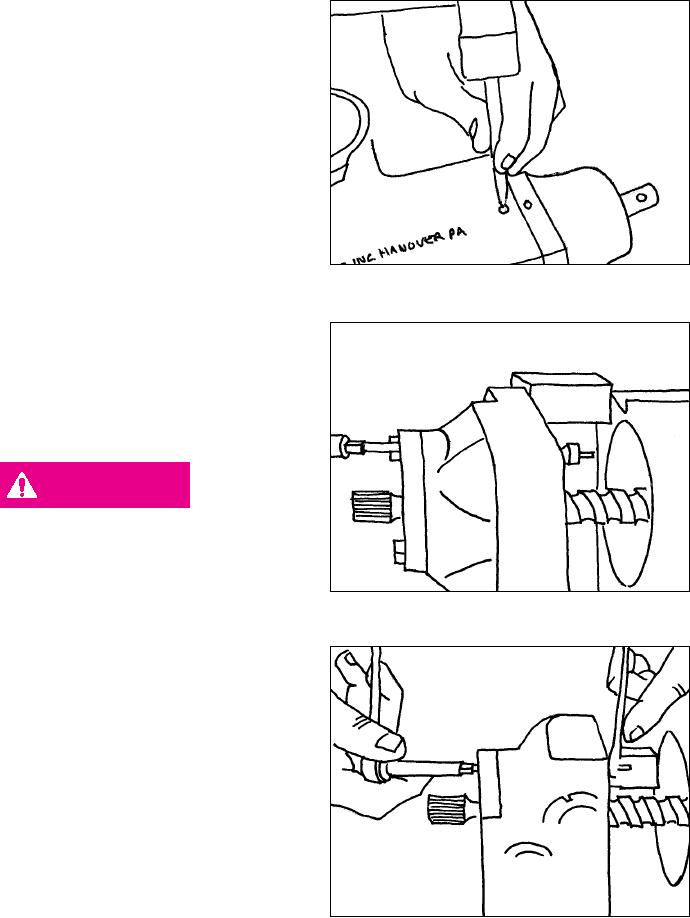
Locate the plunger hole in the end cap. Using
the 1/4" punch and hammer, drive the auto
plunger in until it bottoms out in the bore.
Take care to keep the punch straight in the
bore and use only light hammer blows to
drive the auto plunger assembly. (Figure 44).
NOTE:
It will be necessary to remove the yoke from
the steering gear input shaft to gain access to
the plunger hole in the bearing cap end of the
steering gear.
Figure 44
3.
Mark the bearing cap and housing for
reassembly. Remove the four attaching bolts
from the bearing cap using a 22mm socket.
4.
Separate the bearing cap from the housing by
turning the input shaft out of the steering
gear. Turn the shaft until it stops. Block the
bearing cap to hold it away from the housing.
(Figure 45).
DANGER
DO NOT FORCE THE SHAFT WHEN
TURNING IT OUT. BINDING OF THE
SHAFT CAN OCCUR AND STEERING
GEAR DAMAGE CAN RESULT.
Figure 45
NOTE:
Use caution when blocking the bearing cap
away from the housing so as not to introduce con-
taminants into the steering gear cylinder bore.
5.
Insert the screwdriver into the slotted head of
the plunger body to hold the plunger body in
place. Use the locking pliers to turn the
plunger flange off the plunger body, while
holding the plunger body in place with the
screwdriver.(Figure 46).
NOTE:
The plunger flange is held in place with patch
lock and the threads are staked. Removal of
the flange will require approximately 12-15
in/lbs of torque.
Figure 46
6.
Push the plunger body out of the spring pin.
It may be necessary to use a small punch to
push the plunger body out of the spring pin.
7.
Remove the plunger body.
Discard the
plunger body and flange.
K-54

