TM 5-3805-294-10
0021
OPERATING THE COMPACTOR - Continued
7.
Move compactor (Figure 13, Item 12) over work surface while continuing to apply down pressure.
8.
Release attachment pedal (Figure 13, Item 23) to stop compactor (Figure 13, Item 12).
9.
Engage attachment pedal lock (Figure 13, Item 22).
10.
Safely park and shutdown machine. (WP 0009)
END OF TASK
REMOVING THE COMPACTOR
1.
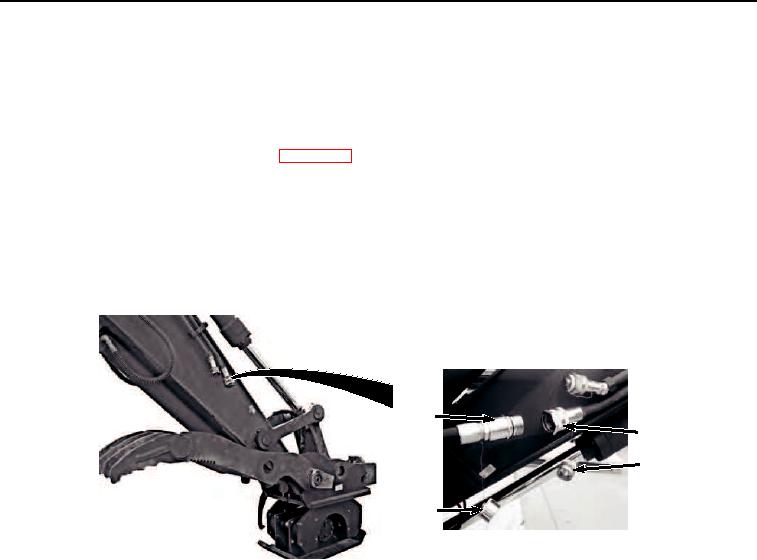
Clean attachment quick disconnect (Figure 14, Item 21) and machine quick disconnect (Figure 14, Item 19)
with rag.
21
19
18
20
HYEX03420
Figure 14. Disconnect Auxiliary Return Line.
2.
Clean cap (Figure 14, Item 20) with rag.
3.
Clean plug (Figure 14, Item 18) with rag.
4.
Remove attachment quick disconnect (Figure 14, Item 21) from machine quick disconnect (Figure 14, Item
19).
5.
Install cap (Figure 14, Item 20) to attachment quick disconnect (Figure 14, Item 21).
6.
Install plug (Figure 14, Item 18) to machine quick disconnect (Figure 14, Item 19).
7.
Clean attachment quick disconnect (Figure 15, Item 17) and machine quick disconnect (Figure 15, Item 15)
with rag.

