
TM 5-3805-294-10
0021
REMOVING THE COMPACTOR - Continued
24
8
9
11
12
25
HYEX03424
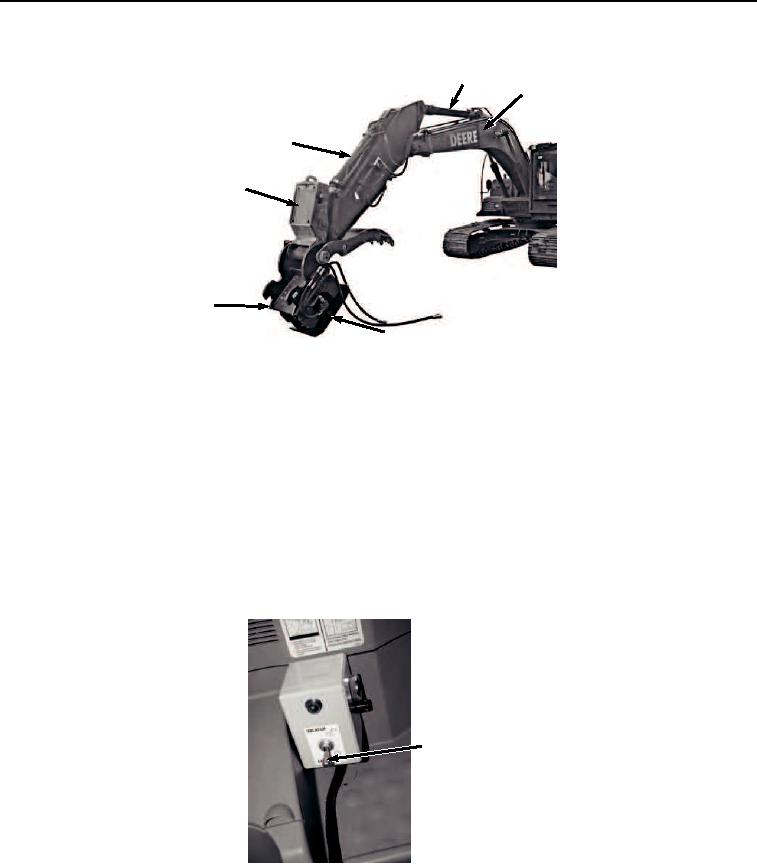
Figure 21. Remove Quick Latch.
20.
Lower boom (Figure 21, Item 8) until compactor plate (Figure 21, Item 25) is just touching the ground.
NOTE
The compactor will likely become wedged between the ground the quick latch/arm until it
"pops" out of the hooks. When this wedged situation occurs, ensure that the tracks do not
begin to raise. If tracks begin to raise: stop movements, raise boom, and try again.
21.
Start with arm in movement until a small amount of pressure is placed on the ground with the compactor (Figure
21, Item 12), then begin to boom down while continuing to arm in until quick latch (Figure 21, Item 11) is
removed from compactor.
22.
Move quick latch switch (Figure 22, Item 7) to LATCH position.
7
HYEX03412
Figure 22.
Quick Latch Switch to Latch Position.
NOTE
There are two auxiliary circuit shutoff valves. There is one located on both sides of the arm.
Left side shown.