
TM 5-3805-294-23-4
0546
REMOVAL - Continued
6
9
7
8
1
2
3
4
5
11
14
12
13
15
10
16
HYEX00840
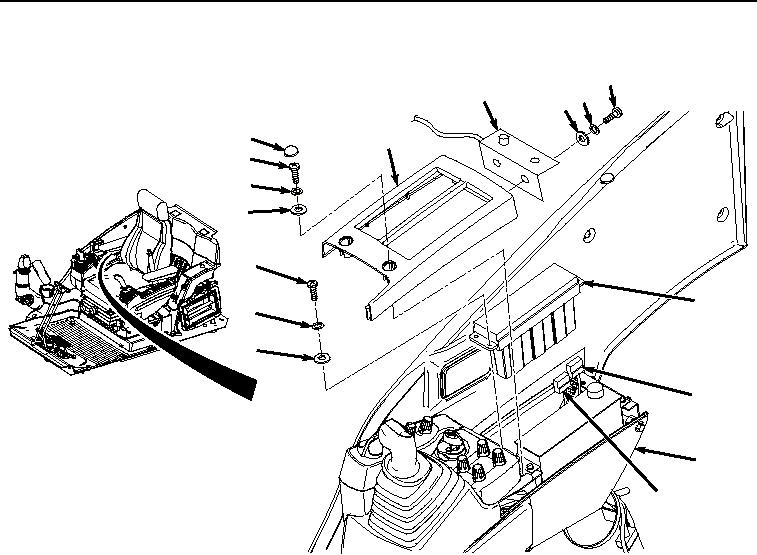
Figure 1. Air Conditioner/Heater Controller Removal.
2.
Remove two screws (Figure 1, Item 3), lockwashers (Figure 1, Item 4), and washers (Figure 1, Item 5) from
top cover (Figure 1, Item 2). Discard lockwashers.
3.
Remove two screws (Figure 1, Item 6), lockwashers (Figure 1, Item 7), washers (Figure 1, Item 8), and overload
alarm bracket (Figure 1, Item 9) from top cover (Figure 1, Item 2). Discard lockwashers.
4.
Remove top cover (Figure 1, Item 2) from right-hand console (Figure 1, Item 10).
5.
Remove four screws (Figure 1, Item 11), lockwashers (Figure 1, Item 12), and washers (Figure 1, Item 13)
from air conditioner/heater controller (Figure 1, Item 14) and right-hand console (Figure 1, Item 10). Discard
lockwashers.
6.
Raise air conditioner/heater controller (Figure 1, Item 14) from right-hand console (Figure 1, Item 10) and
disconnect right-hand console wiring harness connector X48 (Figure 1, Item 15) from air conditioner/heater
controller (Figure 1, Item 14).
7.
Disconnect right console wiring harness connector X49 (Figure 1, Item 16) from air conditioner/heater controller
(Figure 1, Item 14).
END OF TASK