TM 5-2420-230-24-1
b. Installation.
NOTE
Perform Steps (1) through (3) only if
brackets were removed.
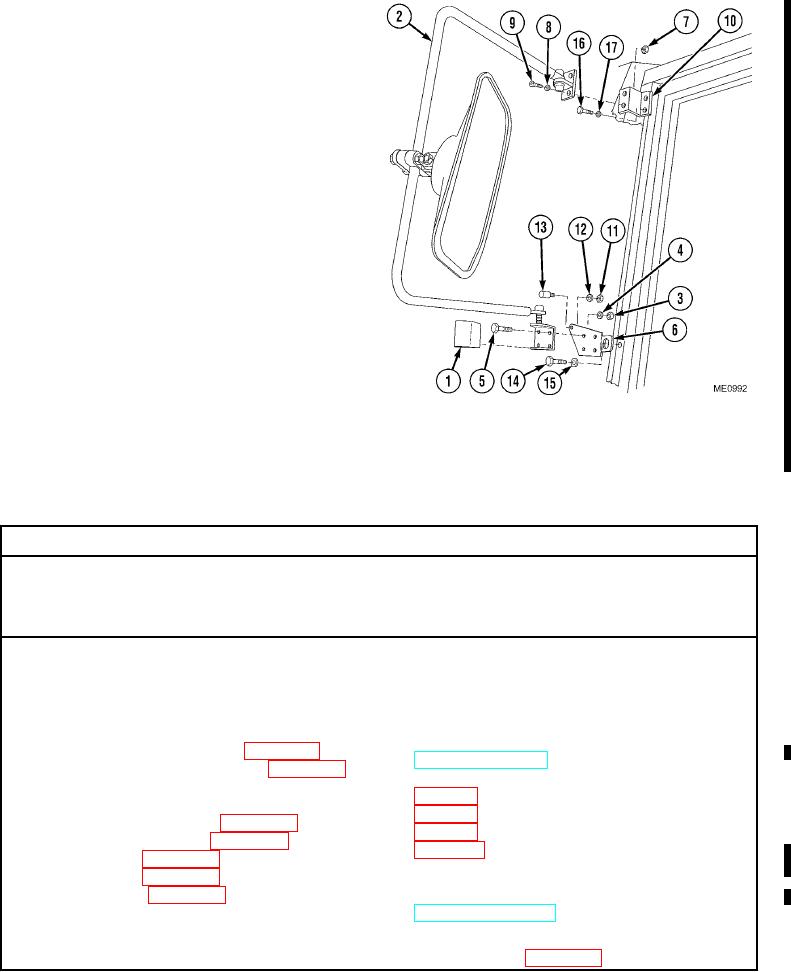
The left and right side remove and install
the same way. Left side is shown.
(1)
Install upper bracket (10) on vehicle with
two washers (17) and bolts (16).
(2)
Install lower bracket (6) on vehicle with
washer (15) and bolt (14).
(3)
Install buffer (13) on lower bracket (6) with
washer (12) and nut (11).
(4)
Install mirror assembly (2) on upper
bracket (10) with two screws (9),
washers (8), and new self-locking nuts (7).
(5)
Install mirror assembly (2) on lower
bracket (6) with four bolts (5), washers (4),
and new self-locking nuts (3).
(6)
Install cover (1) on mirror assembly (2).
13-27. BATTERY STOWAGE BOX MAINTENANCE.
This Task Covers:
a. Removal
b. Disassembly
c. Assembly
d. Installation
e. Follow-On Maintenance
INITIAL SETUP
Test Equipment
References
None
None
Equipment Conditions
Tools and Special Tools
TM or Para
Condition Description
Tool kit, common no. 2, Item 36, Appendix B
Belly plate beneath battery
Tool kit, general mechanics, Item 38, Appendix B
stowage box removed.
Battery cables removed.
Materials/Parts
Batteries removed.
Grommet, blanking, Item 90, Appendix D
Master power switch remove.
Nut, self-locking, Item 109, Appendix D (3)
Remove electrical outlet
Rivet, Item 221, Appendix D (7)
(if equipped).
Rivet, Item 222, Appendix D (8)
Seal, Item 233.1, Appendix D
Drawings Required
TM 5-2420-230-24P Figure 44
Personnel Required
Estimated Time to Complete Task
MOS 62B, Construction Equipment Repairer
Refer to MAC in Appendix B
Change 1

