
TM 5-2420-230-24-1
b. Assembly.
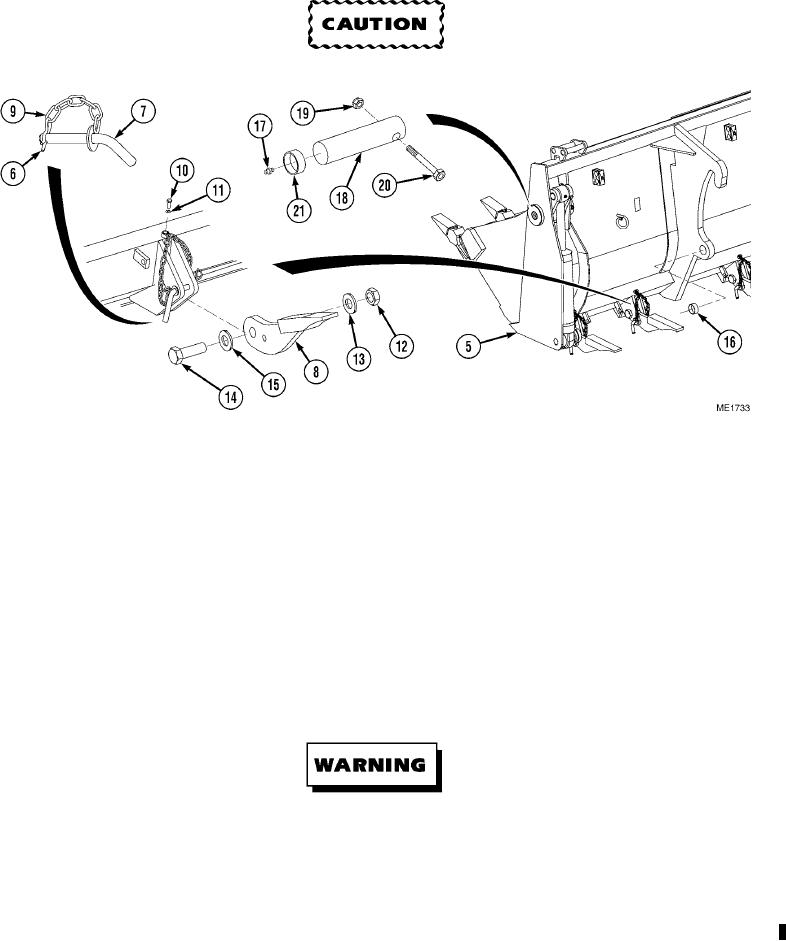
Ensure pins are lubricated before installing. Failure to comply could result in damage to equipment.
(1)
Attach lifting device and sling on upper half of bucket (5).
(2)
Lift and align upper half of bucket (5) with the lower half.
(3)
If required, install two new bushings (21) on both sides of bucket (5).
(4)
Install pins (18) on both sides of bucket (5).
(5)
Install bolt (20) and new self-locking nut (19) in pin (18) on each side of bucket (5).
(6)
Remove dunnage, lifting device, and sling from bucket (5).
(7)
Install grease zerk (17) in pin (18) on each side of bucket (5).
(8)
If required, install bushing (16) on each side of bucket (5).
NOTE
All five ripper arms are installed in the same manner.
(9)
Install ripper arm (8), bolt (14), and washer (15) on bucket (5).
(10) Install new self-locking nut (12) and washer (13) on bolt (14).
Ensure that the bucket is directly supported before assembly/disassembly. Failure to comply may
result in serious injury or death to personnel.
(11) Install chain (9) and pin (7) on bucket (5) with bolt (10) and washer (11).
(12) Install retaining pin (6) on chain (9).
(13) Install pin (7) on bucket (5) and ripper arm (8).
(14) Install retaining pin (6) on pin (7).
Change 1