
TM 5-3805-281-24-2
Cylinder Block, Liners, Pistons, and Rods
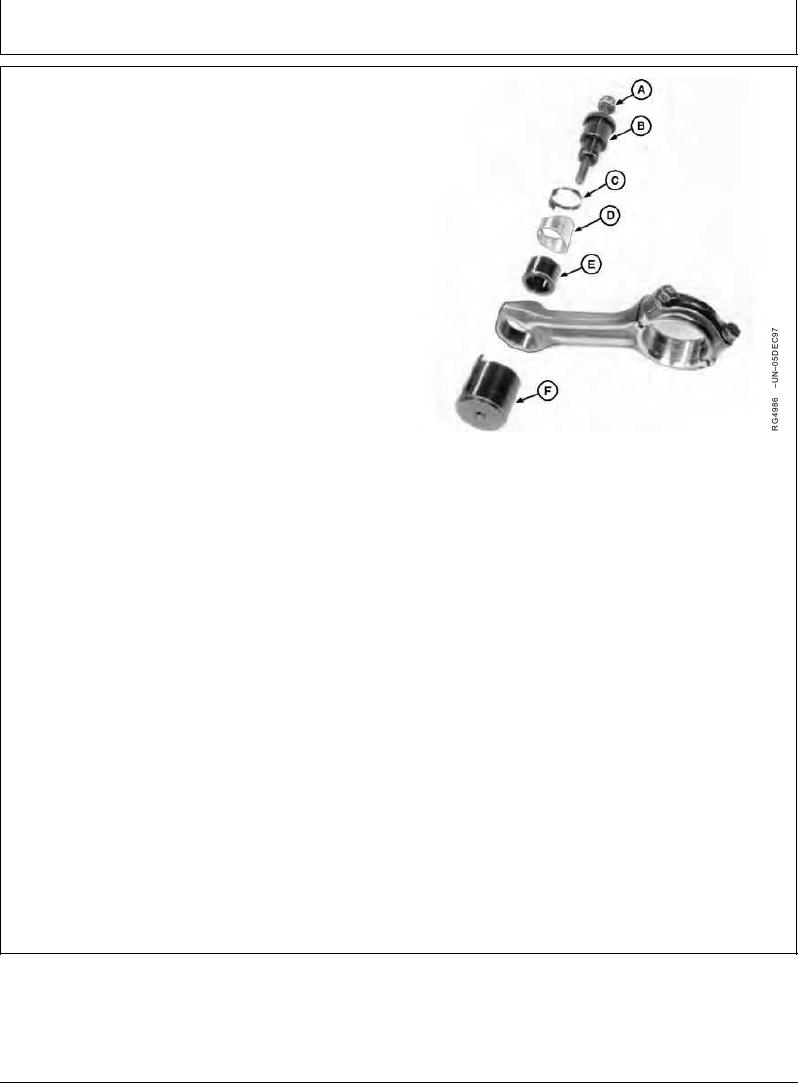
INSTALL PISTON PIN BUSHING IN
CONNECTING ROD
IMPORTANT: Always push new bushing into rod from
back side and burnish bushing after
installation for proper form and seating
in rod bore.
1. Lubricate rod bushing bore and bushing with clean
engine oil. Install bushing using the JDG337 and
JDE98A Connecting Rod Bushing Service Sets.
Use the following tools from the above sets and
assemble in sequence as shown:
STD36104 Forcing Screw With Washer (A)
JDE98A Drive (B)
JDG338 Adapter (C)
Service Bushing (D)
JDE98-3 Pilot (E)
Installing Piston Pin Bushing in Rod
JDE339 Cup (F)
A--STD36104 Forcing Screw With Washer
B--JDE98A Driver
IMPORTANT: Boring of the rod bushing should be
C--JDG338 Adapter
done ONLY by experienced personnel
D--Service Bushing
on equipment capable of maintaining
E--JDE98-3 Pilot
bushing specification.
F--JDE339 Cup
2. Bore I.D. of newly installed bushing to 47.655--47.681
mm (1.862--1.8772 in.) after installation. Remove all
residue from boring operation.
3. Check rod pin-to-bushing clearance. See INSPECT
PISTON PINS AND BUSHINGS, earlier in this group.
4. Replace rod pin as required.
RG,RG34710,1131
1923OCT971/1