
TM 5-2420-230-24-2
Alternator - Installation (0-122)
Section 0 - Engine Disassembly and Assembly - Group 00
Page 0-112
B Series Shop Manual
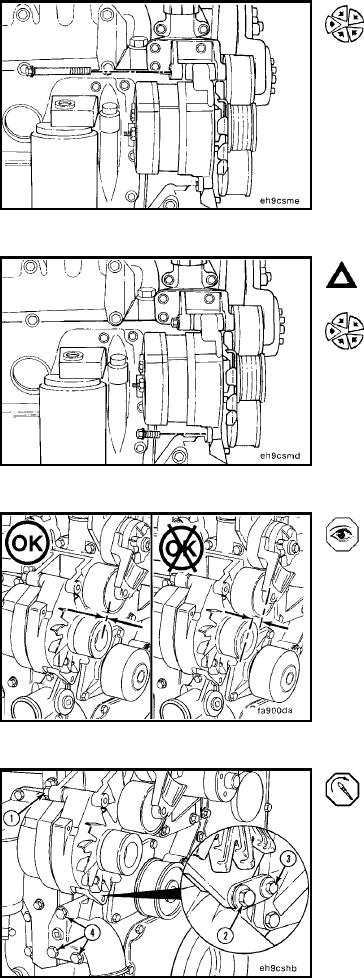
Position the alternator on the bracket and secure it with
the mounting capscrew and spacer.
Do not tighten at this time.
Caution: Do not tighten at this time. To avoid misalign-
ment and overstressing the lower support mounting ear
on the alternator, leave the capscrews loose until all the
alternator parts are installed.
Install the alternator link.
Check the alternator pulley visually or with a straight edge
to make sure it is aligned with the other pulleys and is
parallel to the front face of the block.
After all parts are assembled, tighten all capscrews in the
following sequence:
1.
Alternator-to-alternator bracket capscrew.
2.
Lower brace-to-alternator capscrew.
3.
Alternator-to-water inlet capscrew.
4.
Water inlet-to-block capscrews.
NOTE: Wrench size and torque value is determined by the
make and model of alternator. Refer to the Engine Compo-
nent Torque Values.
L-201