TM 5-3805-281-24-2
Speed Controls
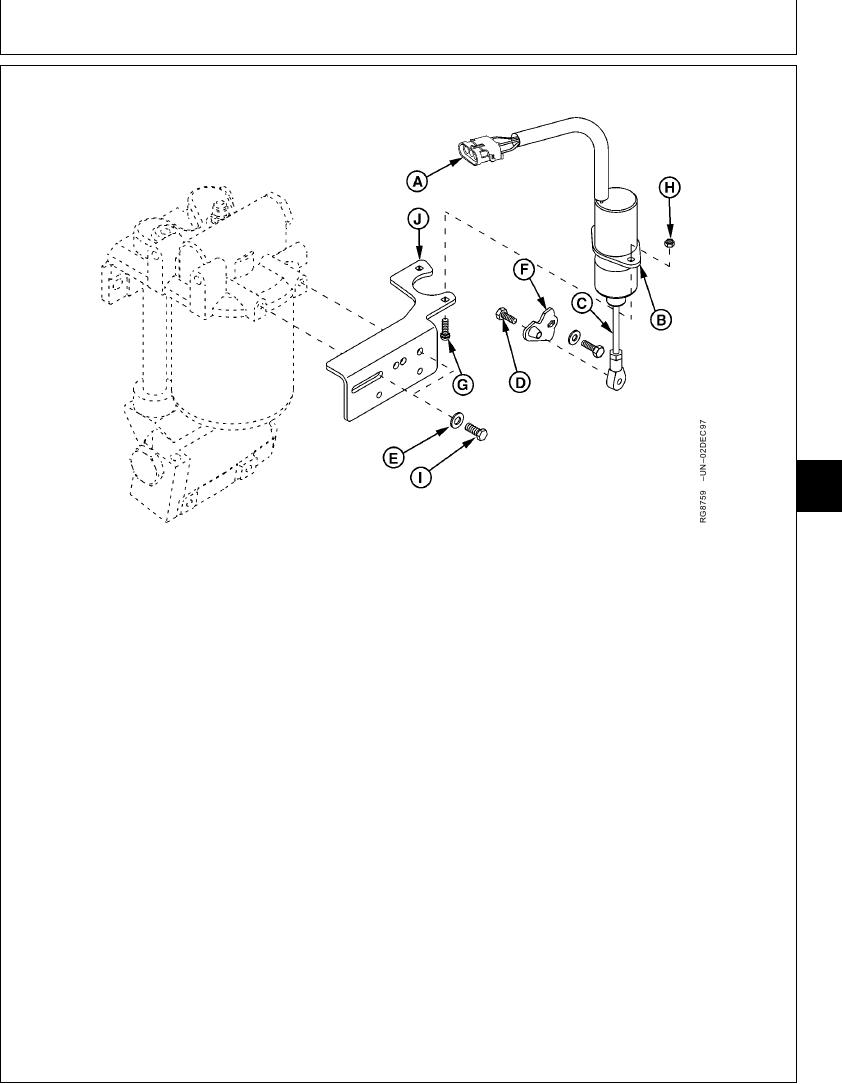
REMOVE AND INSTALL FUEL SHUT-OFF SOLENOID
05
0515
13
A--Wiring Connector
D--Lever Cap Screw
G--Lock Washer and
I--Cap Screw
B--Fuel Shut-Off Solenoid
E--Washer
Screw
J--Solenoid Mounting
C--Solenoid Shaft
F--Fuel Shut-Off Lever
H--Hex Nuts
Bracket
pumps if linkage is binding, check
1. Disconnect electrical wiring connector (A) in
pump for proper alignment.
solenoid lead.
NOTE: Electric fuel shut-off solenoids are factory
2. Remove cap screw (D), and detach solenoid shaft
adjusted to a specified length and should not
(C) from fuel shut-off lever (F).
require additional adjustment. See CTM134 for
diagnosis of fuel shut-off solenoid.
3. Remove fuel shut-off solenoid (B) from solenoid
mounting bracket (J) by removing hex nuts (H) and
machine screws (G).
6. To install fuel shut-off solenoid, reverse removal
procedure. Tighten cap screws (I) and hex nuts (H).
4. If solenoid mounting bracket is to be removed,
Fuel Shut-Off Solenoid Cap Screw--Specification
remove cap screws (I) and washers (E) that fasten
the bracket to oil filter base.
Torque....................................................................... 23 Nm (17 lb-ft)
5. Inspect condition of solenoid and replace parts as
Fuel Shut-Off Solenoid Hex Nut--Specification
necessary. (A repair kit is available from parts for
this solenoid assembly.)
Torque........................................................................... 7 Nm (5 lb-ft)
IMPORTANT: Fuel shut-off solenoid linkage should
move freely back and forth. On "A"
CED,OUOE024,220
1920MAY981/1

