
TM 5-3805-294-23-4
0514
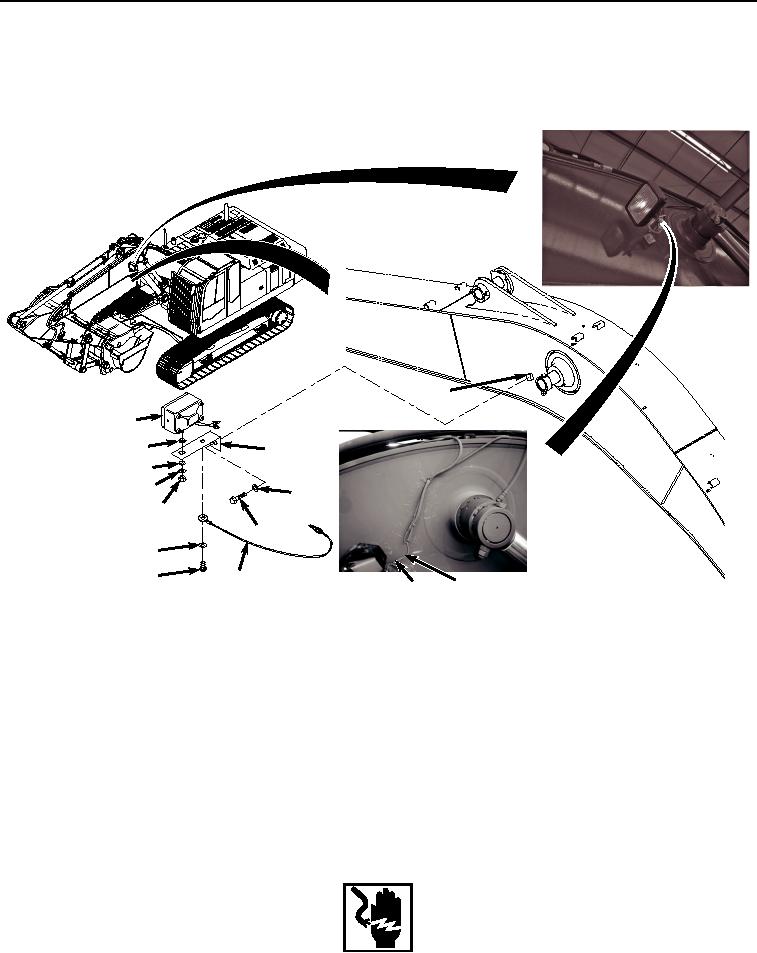
REMOVAL - Continued
1.
Disconnect left boom work light electrical terminal (Figure 1, Item 1) from right boom work light wiring harness
E4 (Figure 1, Item 2).
14
10
11
6
9
8
13
7
12
4
3
5
HYEX02172
2
1
Figure 1. Left Boom Work Light Removal.
2.
Remove screw (Figure 1, Item 3), washer (Figure 1, Item 4), and wire harness (Figure 1, Item 5) from angle
mounting bracket (Figure 1, Item 6).
3.
Remove nut (Figure 1, Item 7), washer (Figure 1, Item 8), washer (Figure 1, Item 9), light (Figure 1, Item 10),
and washer (Figure 1, Item 11) from angle mounting bracket (Figure 1, Item 6).
4.
Remove screw (Figure 1, Item 12), washer (Figure 1, Item 13), and angle mounting bracket (Figure 1, Item 6)
from block (Figure 1, Item 14).
END OF TASK
INSTALLATION
WARNING
Ensure electrical power is off prior to working on all electrical connections. Prior to working
on or around vehicle, remove all jewelry, such as rings, ID tags, bracelets, etc. Jewelry, and