
TM 5-3805-294-23-4
0571
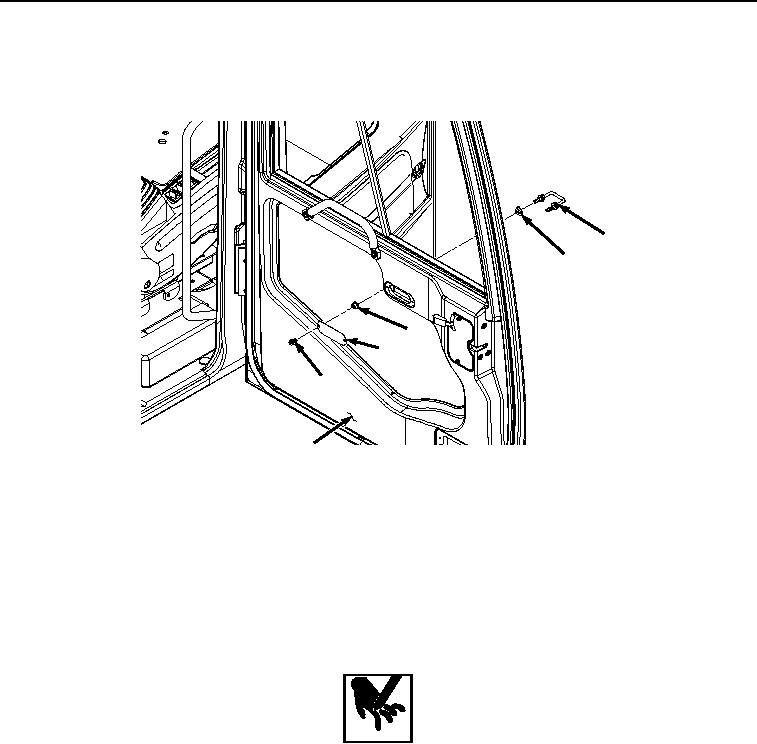
LOWER DOOR WINDOWPANE INSTALLATION - Continued
10.
Install U-bolt (Figure 3, Item 5) to door (Figure 3, Item 3) with two washers (Figure 3, Item 6) and nuts (Figure
3, Item 4). Do not tighten.
5
6
4
2
1
HYEX02651
3
Figure 3. Cover Installation.
11.
Open door (Figure 3, Item 3) fully, then tighten two nuts (Figure 3, Item 4).
12.
Install cover (Figure 3, Item 2) to door (Figure 3, Item 3) with two screws (Figure 3, Item 1).
END OF TASK
RIGHT, REAR, AND LEFT CAB WINDOWPANES INSTALLATION
WARNING
Replace broken window glass carefully. Wear a pair of heavy leather gloves or other suitable
hand protection. Support window glass during removal and installation, as required, so it does
not drop. Failure to comply may result in serious injury or death to personnel.
NOTE
Windowpanes are different shapes and sizes and have different amount of bushings.
Note amount and position of bushings during removal to ensure proper installation.
Left cab (Figure 4, Item 10), rear (Figure 4, Item 11), and right (Figure 4, Item 12) window
panes are replaced the same way. Left cab windowpane shown.