
TM 5-2420-230-24-1
NOTE
Steps (5) and (6) are only required if washer
bottle bracket needs to be removed.
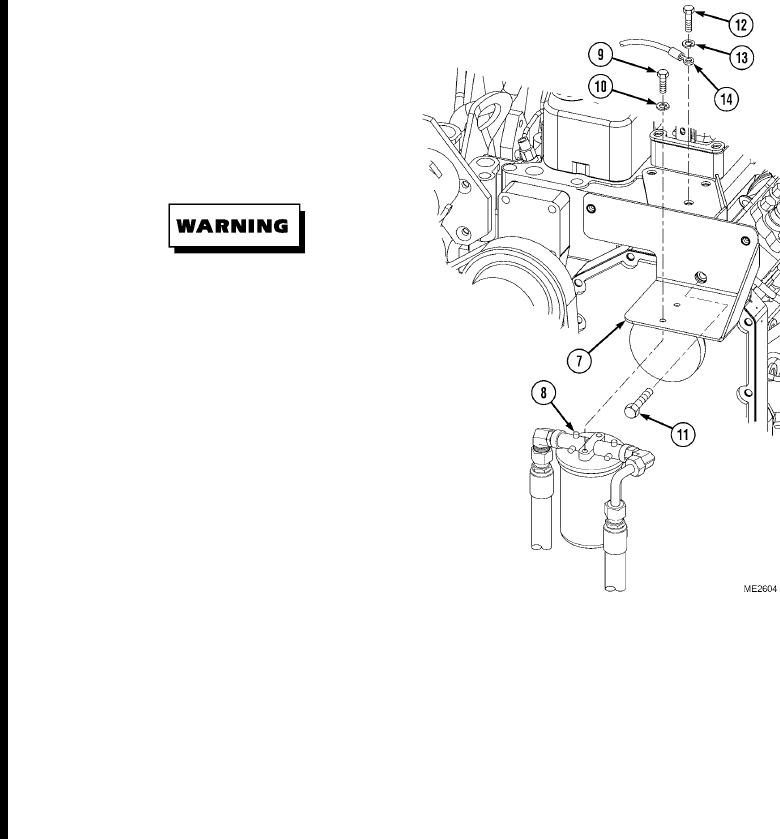
(5)
While supporting oil filter assembly (8),
remove two screws (9) and
lockwashers (10). Set oil filter assembly
aside, ensuring that it is properly supported.
Discard lockwashers.
Remove all jewelry such as rings, dog tags,
bracelets, etc. If jewelry or tools contact
positive electrical circuits, a direct short may
result. Damage to equipment and injury or
death to personnel may occur.
NOTE
Thermostat ground wire is only on vehicles
equipped with a cold weather kit.
(6)
Remove bolt (11), three screws (12),
lockwashers (13), thermostat ground
wire (14) (if equipped), and washer bottle
bracket (7) from vehicle. Discard
lockwashers.
b. Installation.
NOTE
Ensure all hoses and wires are reconnected to positions noted prior to removal.
Install cable ties as necessary.
Steps (1) and (2) are only required if washer bottle bracket was removed.
Thermostat ground wire is only on vehicles equipped with a cold weather kit.
(1)
Install washer bottle bracket (7) and thermostat ground wire (14) (if equipped) on vehicle with three new
lockwashers (13), screws (12), and bolt (11).
(2)
Position oil filter assembly (8) under washer bottle bracket (7), and install with two new lockwashers (10) and
screws (9).
Change 1
12-64