
TM 5-2420-230-24-1
(3)
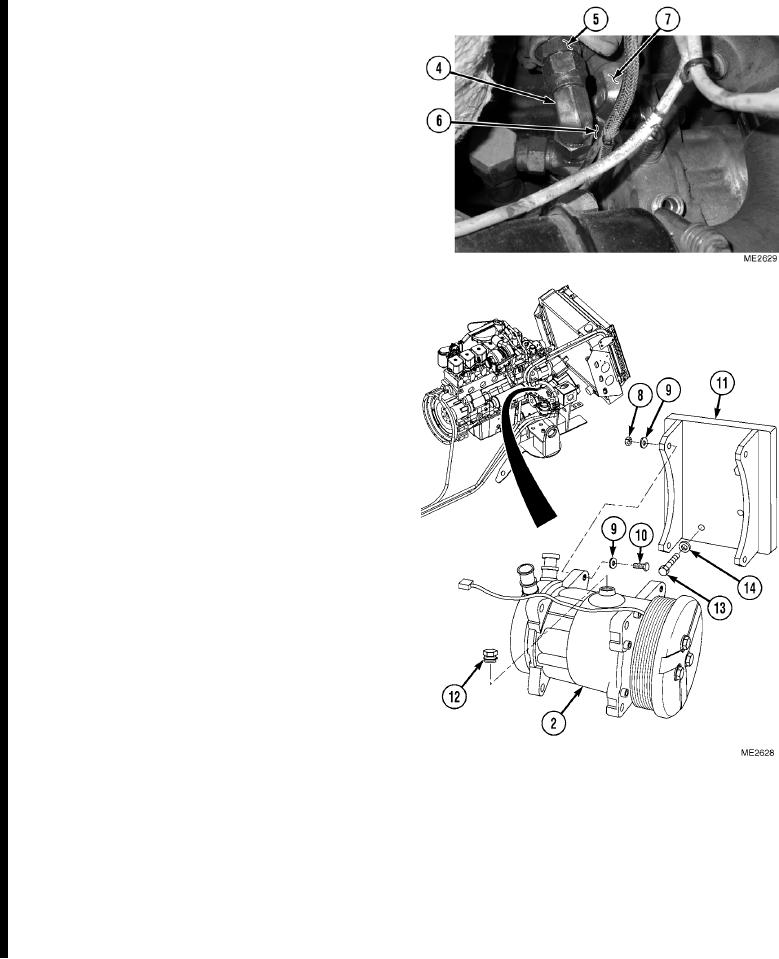
Remove elbow (4) and fitting (5) from
engine oil cooler.
(4)
Remove hose (6) and elbow (7) from engine
oil cooler.
(5)
Remove four self-locking nuts (8), eight
washers (9), four bolts (10), and
compressor (2) from bracket (11). Discard
self-locking nuts.
(6)
Remove oil plug (12) from compressor (2).
(7)
Drain, measure, and record quantity of oil
removed from compressor (2).
(8)
If required, remove three bolts (13),
lockwashers (14), and bracket (11). Discard
lockwashers.
b. Installation.
NOTE
Ensure all hoses, wires and tubes are
reconnected to positions noted prior to
removal.
Install cable ties as necessary.
(1)
If removed, install bracket (11) with three
new lockwashers (14) and bolts (13).
NOTE
Compressor may be shipped with preserving
oil and caps on ports.
(2)
If necessary, remove shipping caps and oil
from compressor (2).
(3)
Remove oil plug (12) from new
compressor (2). Inspect O-ring on oil plug.
Replace oil plug if O-ring is damaged.
(4)
Drain oil from new compressor (2).
(5)
Using same amount of new oil as recorded in removal, fill new compressor (2).
(6)
Install oil plug (12) on compressor (2). Torque plug to 14 lbf/ft (19 Nm).
(7)
Install compressor (2) on bracket (11) with four bolts (10), eight washers (9), and four new self-locking nuts (8).
(8)
Install elbow (7) and hose (6) on engine oil cooler.
(9)
Install fitting (5) and elbow (4) on engine oil cooler.
Change 1
19-16