
TM 5-2420-230-24-1
(2)
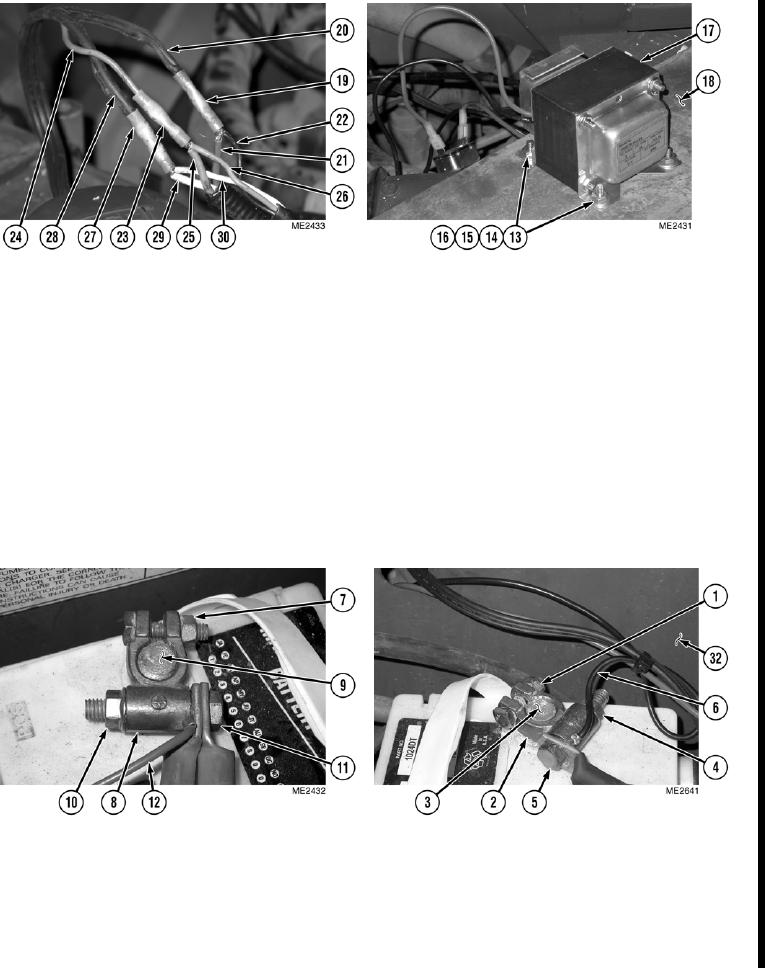
Remove 0.25 in. (6 mm) of insulation from end of three trickle charger wires (22), (26), and (30).
(3)
Remove 0.25 in. (6 mm) of insulation from end of three block heater wires (21), (25), and (29).
(4)
Remove 0.25 in. (6 mm) of insulation from end of three electrical outlet wires (20), (24), and (28).
(5)
Connect ends of white trickle charger wire (30), white block heater wire (29), and smooth electrical outlet
wire (28) with wire connector (27).
(6)
Connect ends of green trickle charger wire (26), green block heater wire (25), and green electrical outlet wire (24)
with wire connector (23).
(7)
Connect ends of black trickle charger wire (22), black block heater wire (21), and ridged electrical outlet wire (20)
with wire connector (19).
(8)
Install electrical tape on connections.
(9)
Install trickle charger (17) on bottom side of hydraulic reservoir step plate (18) with four screws (16),
washers (15), new lockwashers (14), and nuts (13).
(10) Route wires (6) and (12) through back of battery box (32).
(11) Install wire (12) on positive (+) terminal (8) with screw (11) and nut (10).
(12) Install positive (+) terminal (8) on positive (+) terminal post (9) and tighten nut (7).
(13) Install wire (6) on negative (-) terminal (3) with screw (5) and nut (4).
(14) Install negative (-) terminal (2) on negative (-) terminal post (3) and tighten nut (1).
Change 1
20-57