
TM 5-3805-294-23-4
0607
REMOVAL - Continued
15
16
17
18
20
11
12
19
14
10
13
HYEX00701
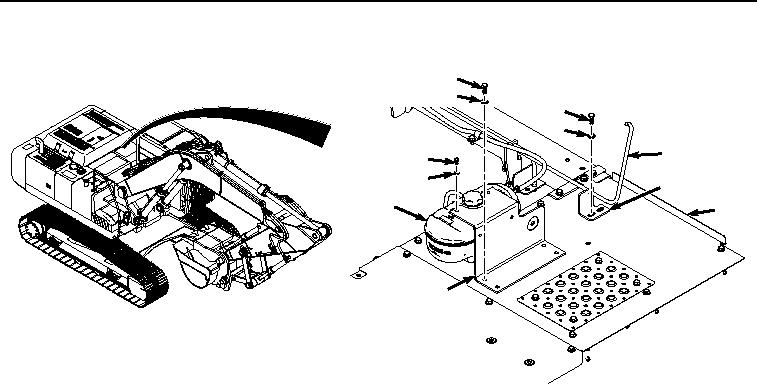
Figure 4.
Radiator Surge Tank Bracket Removal.
8.
Remove four bolts (Figure 4, Item 15) and washers (Figure 4, Item 16) from bracket (Figure 4, Item 13) and
cover (Figure 4, Item 10).
9.
Remove bracket (Figure 4, Item 13) from cover (Figure 4, Item 10).
10.
Remove two bolts (Figure 4, Item 17) and washers (Figure 4, Item 18) from bracket (Figure 4, Item 19).
11.
Slide bracket (Figure 4, Item 19) aft along bar (Figure 4, Item 20) to permit cover (Figure 4, Item 10) removal.
NOTE
Cap and plug tank (Figure 5, Item 14) and hose (Figure 5, Item 22) upon removal.
The tank (Figure 5, Item 14) is not fully removed from the machine. The tank (Figure 5,
Item 14) is disconnected from the hose (Figure 5, Item 22) to allow the cover (Figure 5,
Item 10) to slide out under the tank (Figure 5, Item 14).
12.
Loosen clamp (Figure 5, Item 21) and remove tank (Figure 5, Item 14) and clamp (Figure 5, Item 21) from hose
(Figure 5, Item 22).