
TM 5-3805-281-24-2
Fuel System
DISASSEMBLE FUEL INJECTION NOZZLE
General Nozzle Repair Notes:
NOTE: Disassembly of nozzles is not recommended
unless servicing is indicated by nozzle operation
and testing.
Since dirt and water are the worst contaminants in fuel
injection systems, working area, tools, and cleaning
materials must be kept spotlessly clean. Whenever
possible, work in an isolated, dust-free area.
Disassembly of Injection Nozzle
Cover workbench with clean paper before disassembly of
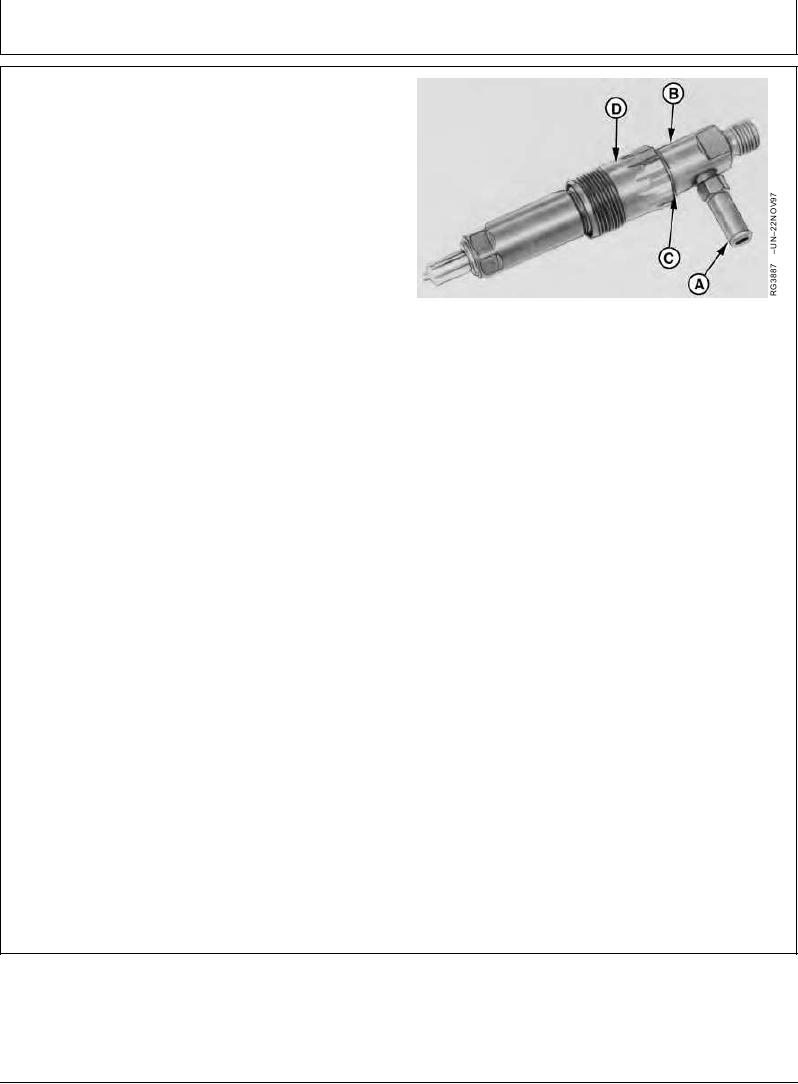
A--Leak-off Connector
injection nozzles.
B--Nozzle Holder
C--O-Ring and Upper Snap Ring
As parts are disassembled, place them in a pan of clean
D--Gland Nut
diesel fuel and leave there until needed. Do not permit
parts to strike each other.
Use a separate pan of clean diesel fuel for washing parts
before assembly.
NOTE: Bosch KDEL and Nippondenso KDAL injection
nozzles are metric design. Use only metric tools
to service nozzles.
1. Use an 11 mm box or open-ended wrench and
unscrew leak-off connector (A) (if not removed
previously) out of nozzle holder (B).
2. Clamp flats of nozzle holder in a soft-jawed vise.
Remove upper snap ring (C) from nozzle holder.
3. Slip gland nut (D) off nozzle holder.
NOTE: Bosch nozzles have a snap ring and O-ring at top
of gland nut that must be removed before gland
nut can be removed.
Continued on next page
RG,RG34710,1308
1923OCT971/2