
TM 5-3805-294-23-4
0526
REMOVAL - Continued
12
13
3
14
4
S
LT
VO VE
3
24 SLA LE
C TAC
D P
E
EC
18
R
8
9
2
6
1
7
S
11
LT
VO VE
24 SLA LE
C TAC
D P
E
EC
10
R
5
16
15
17
HYEX01178
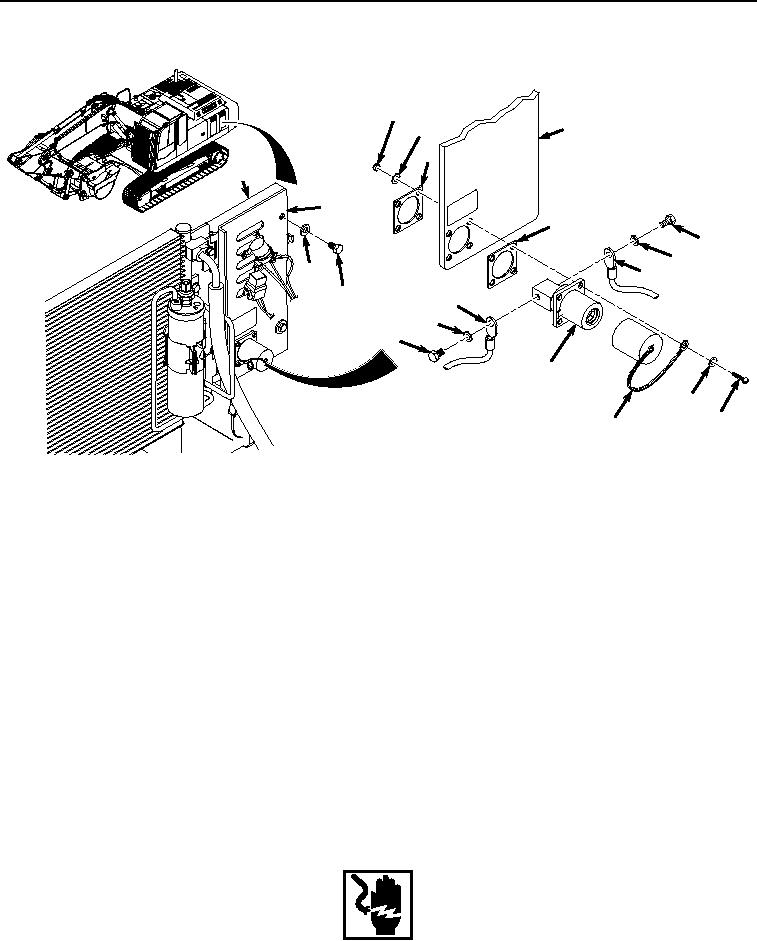
Figure 1.
Slave Receptacle Bracket Removal.
2.
Carefully clean silicone from slave receptacle (Figure 1, Item 5) and cables (Figure 1, Item 6) and (Figure 1,
Item 7).
3.
Remove bolt (Figure 1, Item 8), lockwasher (Figure 1, Item 9), and cable (Figure 1, Item 6) from slave receptacle
(Figure 1, Item 5). Discard lockwasher.
4.
Remove bolt (Figure 1, Item 10), lockwasher (Figure 1, Item 11), and cable (Figure 1, Item 7) from slave
receptacle (Figure 1, Item 5). Discard lockwasher.
5.
Remove four locknuts (Figure 1, Item 12), washers (Figure 1, Item 13), and backing plate (Figure 1, Item 14)
from bracket (Figure 1, Item 3) and screws (Figure 1, Item 15). Discard locknuts.
6.
Remove four bolts (Figure 1, Item 15), washers (Figure 1, Item 16), and dust cover (Figure 1, Item 17) from
slave receptacle (Figure 1, Item 5).
7.
Remove slave receptacle (Figure 1, Item 5) and backing plate (Figure 1, Item 18) from bracket (Figure 1, Item
3).
END OF TASK
INSTALLATION
WARNING
Ensure electrical power is off prior to working on all electrical connections. Prior to working
on or around vehicle, remove all jewelry, such as rings, ID tags, bracelets, etc. Jewelry, and