
TM 5-3805-294-23-4
0529
STARTER RELAY INSTALLATION - Continued
NOTE
Install tie wraps as noted prior to removal.
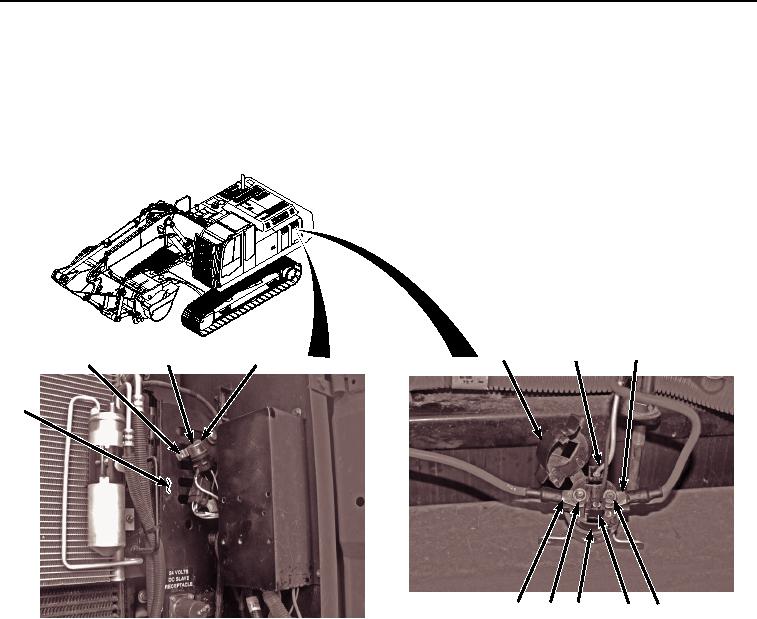
1.
Install wire terminal (Figure 2, Item 12) and wire terminal (Figure 2, Item 11) to starter relay (Figure 2, Item 4)
with two lockwashers (Figure 2, Item 10) and nuts (Figure 2, Item 9).
1
1
2
2
8
6
12
4
3
3
5
9
11
4
7
9
10
10
HYEX03321
Figure 2.
Starter Relay Installation.
2.
Close starter relay cover (Figure 2, Item 8).
3.
Connect connector (Figure 2, Item 7) and connector (Figure 2, Item 6) to starter relay (Figure 2, Item 4).
4.
Install starter relay (Figure 2, Item 4) to slave receptacle panel (Figure 2, Item 5) with two locknuts (Figure 2,
Item 3), washers (Figure 2, Item 2), and screws (Figure 2, Item 1).
END OF TASK